This is another simple yet very helpful feature in Excel. This allows you to split your data in one column into multiple columns based on a simple condition.
The condition could be:
- A delimiting character
- A fixed length of text
Consider an example where you have user information in your excel with the data separated by semi-colon.
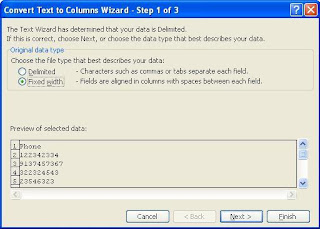
 In order to get this data aligned properly in different columns, select all the data in the first column and use the option Data --> Text to Columns..
 Select the ‘Delimited’ option for Original data type.
 Select ‘Semicolon’ as the delimiter to be used. In bottom ‘Data preview’ pane, you will be able to see the preview of how your sheet would look like after applying the condition.
 In the next screen, you can set the data format for each column. Then click on the ‘Finish’ button.
 The data would now have been adjusted into different columns.
Now, if you want the Name column to be split into two columns, one containing the first name and the other, the last name:
Insert a new column between the Name and City columns and follow exactly the same procedure for the first column but this time selecting ‘Space’ as the delimiter.

 Now, if you want the phone number to be split into the country code (first two digits) and the actual phone number, you may again use the ‘Text to Columns...’ feature.
This time, select column G and choose ‘Fixed width’ for the ‘Original data type’.
 In the scale to measure character length, set the delimitation for 2 characters.
 Once you have finished formatting your sheet, you may need to correct your columns headings:


